Confessions of a Pinterest JUNKIE
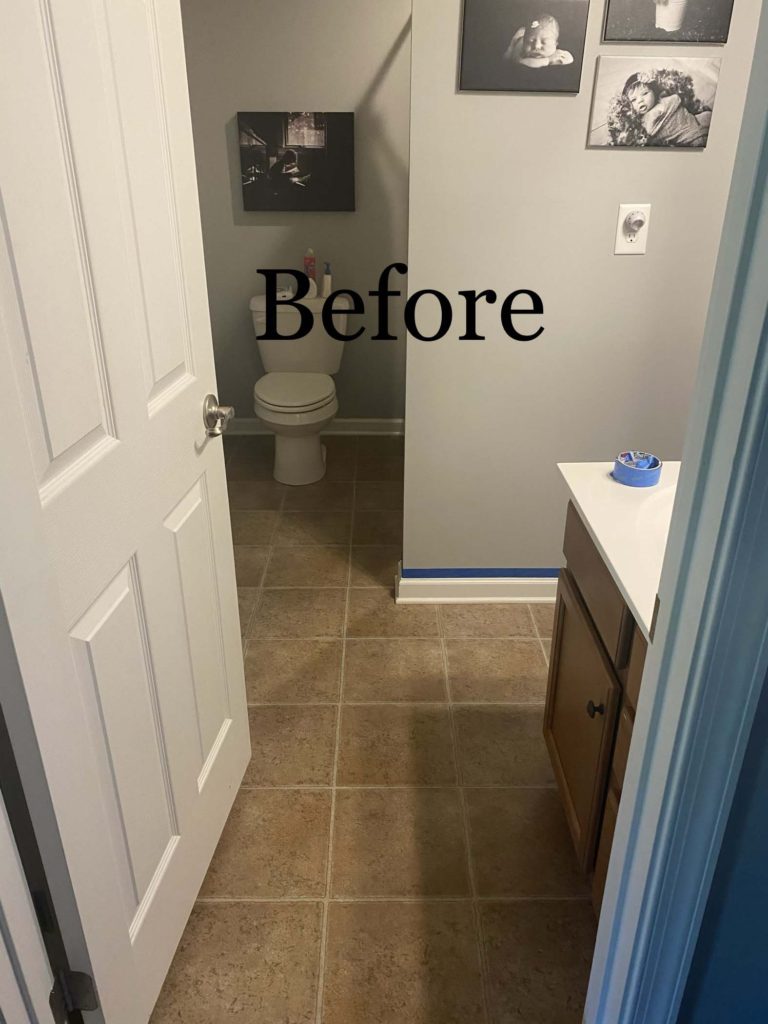
Okay, it’s no secret that I’m artsy-fartsy. Photography, DYI projects, HGTV stalker, and Pinterest Junkie. Hi, my name is Katie and I’m a Pinterest Junkie. Since quarantine, the hubs and I have taken to completing MANY projects around the house. I guess since we are all sitting around staring at the same décor over and over, I wanted to research ways to redo things around the house on a budget. Enter Pinterest. People have asked how I’ve done some of these projects, so I figured it would be best to write some posts to share what we used and how we did them. So…here’s my first one! Weeeeee! Below is the before picture of our upstairs bathroom. Kinda blah, if you ask me. I wanted a new floor to give it some pizzaz, but didn’t want to spend oodles of money.

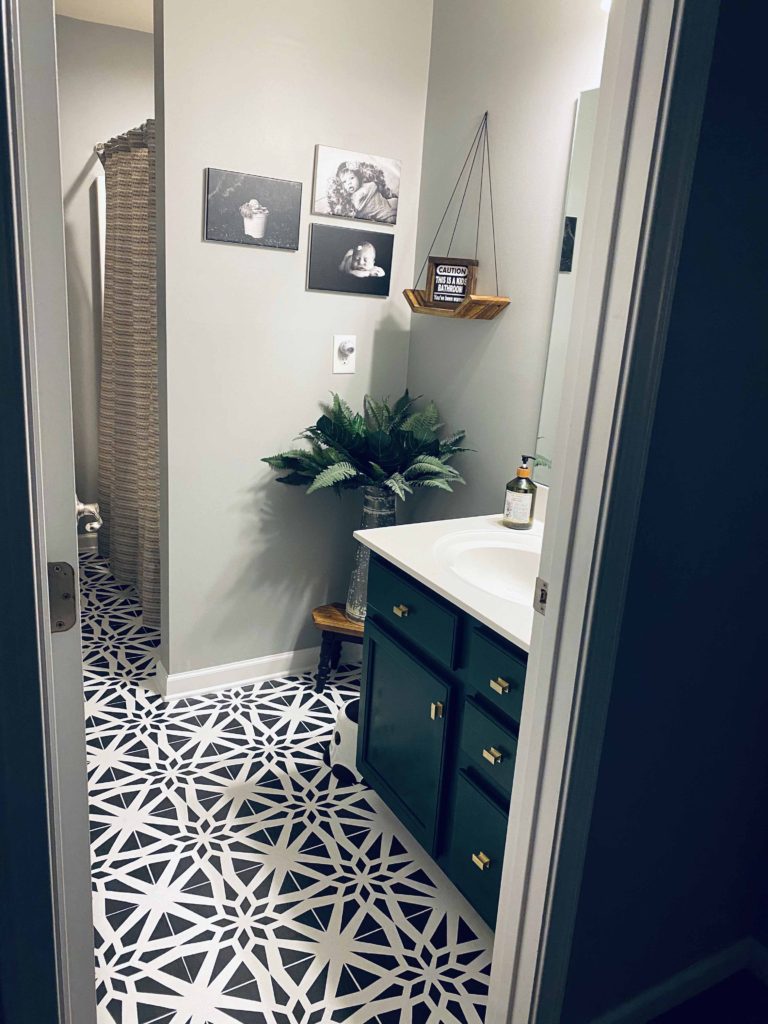
This flooring was linoleum. Completely outdated, in my opinion, and just BLAH. So Pinteret told me to paint and stencil it since the ceramic tile I wanted would cost around $1000! This project only cost around $150 for supplies and paint. That’s a STEAL! I also used fusion mineral paint (“pressed fern”) to paint the vanity (more on that later!). This is the after and I LOVE it!:

SUPPLY LIST
Here is the list of things used in this project. (Disclaimer: I am an Amazon Affiliate, so I receive a small commission if purchased through my link. These are all the things that are tested and true and LOVE!)
*Paint: I used this base coat for the floor (used for exterior and interior porch paint–so, super durable). The paint I used was white and I did two coats after heavily cleaning off the dust and grime.
*Mini Roller for the Stencil: I like this particular one because it came with replacements and a tray.
*The STENCIL PAINT I used was Rustoleum chalk paint and the color was charcoal.
*The AMAZING STENCIL I used and LOVE! I ordered two so that I could alternate while one was being washed and drying. I also cut part of one to reach the corners.
*The TOP COAT I used was heavy duty! I didn’t want to go through this whole process and have it chip! I used something that was made for cars to sit on. Now THAT’S durable.
*SMALL PROJECT PAINT BRUSHES: these are for fixing any mistakes.
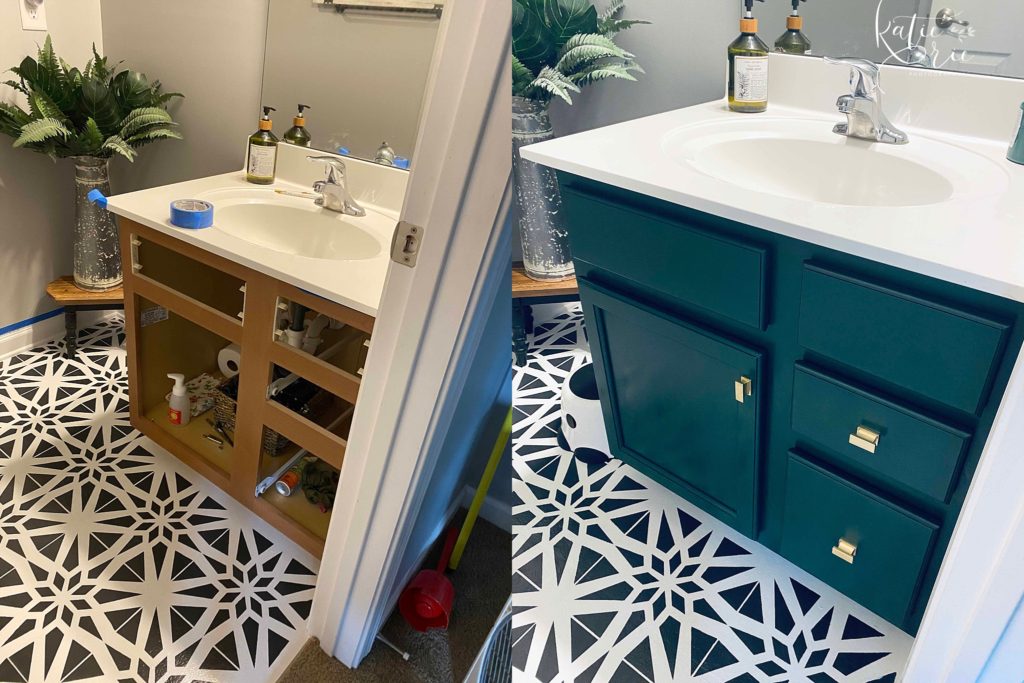
*The VANITY PAINT-Fusion Mineral Paint: I’m OBSESSED with this color and this paint! I literally tried to find random things around the house to paint with this color because it’s SO pretty! Pressed fern, which is like a deep emerald color. I chose fusion mineral paint because after all the research I did, Pinterest informed me that it’s the mecca of all paints for this type of project. I actually used fusion mineral paint to paint our dressers and our other bathroom vanity as well. You don’t need a base coat, you don’t have to sand the surface (although I still lightly sanded the vanity out of habit), and there’s no top coat necessary! Ummm…need I say more?! Sign me up for all the things low-maintenance. Oh! AND it has held up very nicely! There are MANY different colors and a little goes a VERY long way! One little jar covered 90% of all our bedroom furniture!
*KNOB PULLS: I wanted something more up-to-date and trendy for this bathroom so I went for the brushed brass. I LOVE how it looks with the green!
PROCESS AND TIPS:
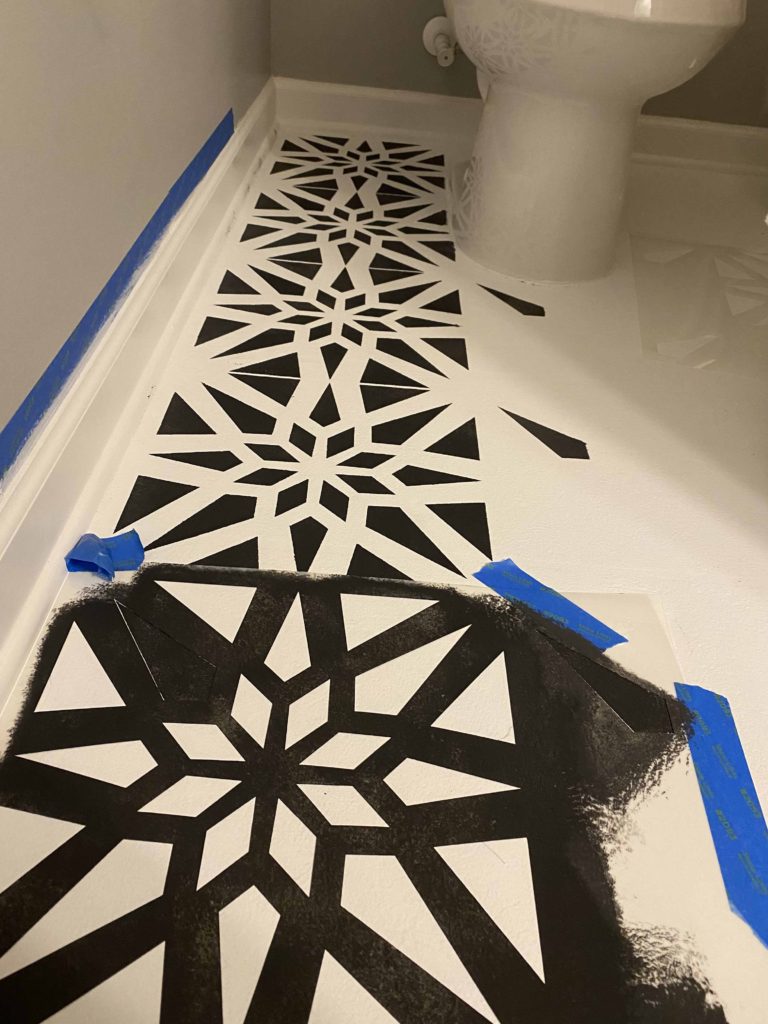
 Tip ONE: When using the stencil and the mini foam roller, make sure that there isn’t too much paint on it. Otherwise the paint will bleed under the stencil. I used the tray to roll off the extra paint. The best part about these stencils is that they line up perfectly. See how the top diamonds line up? That was from the previous stenciled block. It looks super complicated, but it’s actually really easy! I also loved that I could easily give the floor molding a little face-lift by re-painting them white.
Tip TWO: Make sure to wipe off access paint off the bottom of the stencil! I did a row and alternated the stencils (remember, I bought TWO!), and then wiped off the paint, let it dry and repeated the whole process. I also didn’t worry about mistakes because I knew once the paint dried I could touch up the area.
Tip THREE: in order to reach the corners and crevasses, I cut one of the stencils so I could match up the pieces and still be able to fit in those small areas. I waited to do this on a different day so the stencil paint would already be dry. I also did all the touch-ups during this time as well. I used tiny project paint brushes and got on my hands and knees to fix the mistakes.
Tip FOUR: Wait 24 hours for stencil to dry and then do the top coat. Wait another 24 hours and do another top coat just to be sure.
I did the vanity after everything with the floor was completed and it was like the cherry on top! What do you think? I also ordered a black faucet to complete the look! Not bad for a transformation on a budget!

Thinking of doing a project like this one? Let me know what you think!
